Introduction to Cypress
Cypress is an innovative testing tool built for the modern web. It’s known for its ease of use, real-time feedback, and developer-friendly nature. But what makes Cypress particularly appealing is its accessibility to non-developers. You don’t need to be a seasoned coder to get started!
Why Cypress is Great for Testers
- User-Friendly Interface: Cypress provides a straightforward and intuitive interface that makes test creation and debugging simpler.
- Real-Time Visual Testing: See tests execute in real time and view results immediately.
- Rich Documentation and Community Support: Cypress has extensive documentation and a supportive community, which is great for learning and troubleshooting.
Setting Up Your Cypress Project
Step 1: Download and Install
Visit the Cypress website and download the Cypress Test Runner for your operating system. The installer will guide you through the setup process.
Step 2: Initialising Cypress and Creating the First Test
- Create a new project folder: Create a new folder (e.g ‘first-project’) in any location (e.g Desktop or Documents)
- Open Cypress: Launch the Cypress Test Runner from your applications or programs list.
- Open a New Folder: Use the Test Runner’s interface to initialise a new project: click Add project and select the folder you just created
- Select Testing Type: You will be prompted to select a testing type, in this example we choose E2E testing
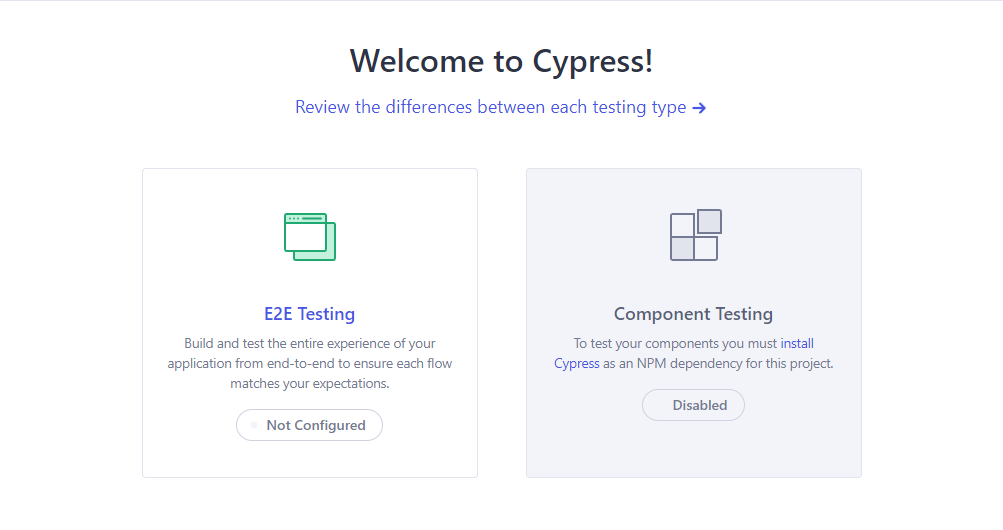
- Configuration Files: Click Continue on the next step
- Choose a Browser: Choose your favourite browsers, e.g Google Chrome and click “Start E2E Testing in Chrome”
- Create a New Spec: Select “Create new spec” for now. You can later check out “Scaffold example specs” to have some additional examples
- Name Your New Spec: Add a name for your test file, e.g test.cy.js. In the future we recommend naming the test files according to what you’re testing, e.g login.cy.js or header.cy.js etc. Click ‘Create spec’
- Run the Spec: Click “Okay, run the spec” to run the test that was just created
Step 3: Creating Your Own Test
Open the Folder in a Text Editor: We recommend using Visual Studio Code. Click File -> Open Folder -> Click on the Folder you created (single click) -> Click Select Folder. You should see the default project structure:
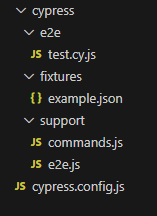 Cypress has automatically created some folders and files for you. We recommend you use the same structure in your project(s).
- e2e folder - this where the test files are located. All matching files in this folder will be shown in the test runner
- fixtures folder - place to keep static files you can use in your tests
- support folder - folder to keep your custom commands and support file (e2e.js)
- configuration file - cypress.config.js, where you can overwrite default configuration
Create Your Own Test File: Inside the e2e folder create a new file (right-click on e2e folder -> New file…), e.g. ‘test2.cy.js’. The “.cy.js” suffix is important.
Copy the code below to the file and save it:
describe('Custom spec', () => {
    it('First custom test', () => {
        cy.visit('https://cypress.io')
        cy.get('h1')
          .should('have.length', 1)
          .and('contain', 'Test. Automate. Accelerate.')
    });
});
This Test goes to cypress.io web page, checks that it has only one h1 element and that it contains text ‘Test. Automate. Accelerate.’
Step 4: Running Your Tests
- Go to the Specs List: If you still have the runner open, click on the Specs menu item.
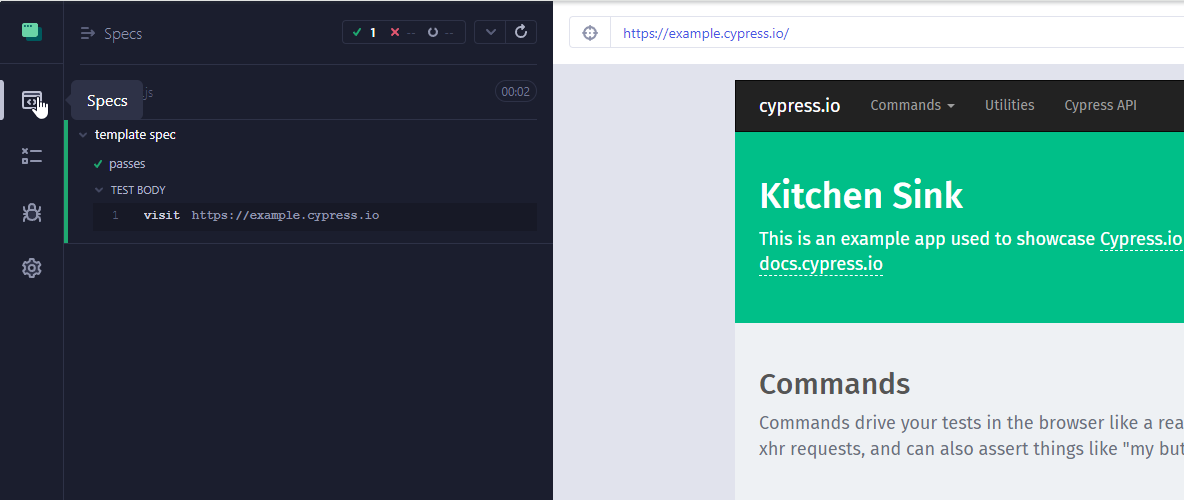 Otherwise open the project again in the Cypress Test Runner
 - Select the New Spec to Run It: You should now see another spec file - test2.spec.js. Click on it to run it
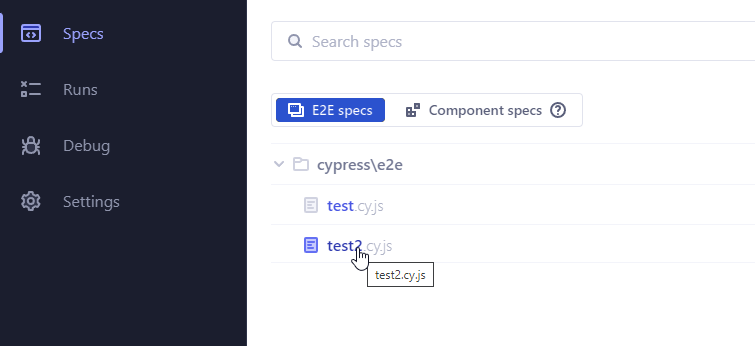
This is how you can add specs and run them one by one. As the “Run all specs” is currently not enabled by default, we’ll add a new post in the future to enable that.
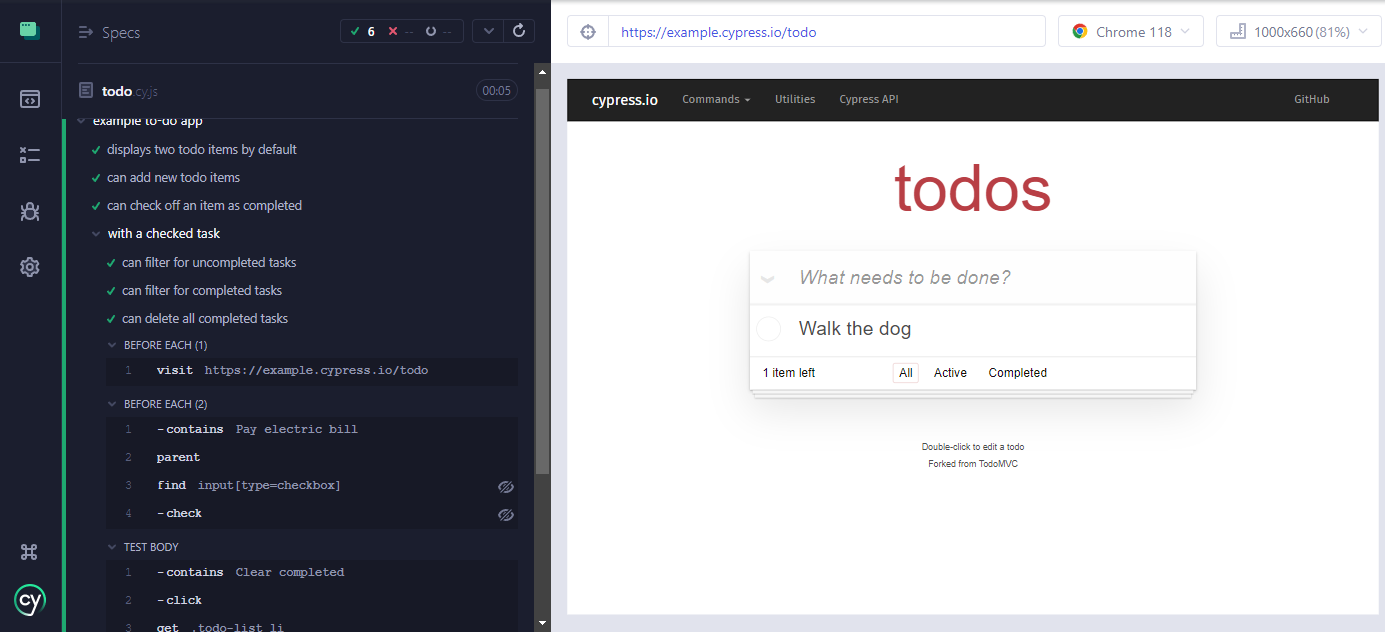
Here’s an example of how the test runner will look like in the future with more tests and steps:
Tips for Non-Developers Using Cypress
- Regularly Refer to Documentation: Cypress’s documentation is very user-friendly. Regularly consulting it can help you gradually build up your testing and coding knowledge.
- Engage with the Community: Join Cypress forums or groups. The community can be a great resource for learning and troubleshooting.
- See Our Example Project: There are examples of best practices, recommended project structure, custom commands and much more - https://github.com/bigbytecy/bigbyte-example-project
Conclusion
Cypress is not just for developers; it’s a powerful tool for testers of all skill levels. By utilizing its user-friendly interface and comprehensive resources, you can embark on or enhance your test automation journey with confidence.
Stay tuned for more posts where we’ll explore specific Cypress features and provide practical advice for both testers and developers alike. If you have any questions or specific areas you’d like us to cover, feel free to reach out!