Cypress is a powerful end-to-end testing framework that makes it easy to write and run tests for your web applications. In this tutorial, we’ll guide you through the process of installing Cypress using Yarn and running your first test from the command line.
Prerequisites
Before you begin, ensure that you have Node.js and npm or Yarn installed on your machine. You can download Node.js and npm from nodejs.org and Yarn from yarnpkg.com
Setting Up Your Cypress Project
Step 1: Create a New Project
Start by creating a new directory for your Cypress project. Open your terminal and run the following commands:
mkdir my-cypress-projectcd my-cypress-projectStep 2: Initialize Your Project
Initialize your project with Yarn or npm to create a package.json file. Run the following command:
yarn init -yor
npm init -yThis command creates a basic package.json file with default values.
Step 3: Install Cypress
Now, it’s time to install Cypress. Run the following command:
yarn add cypress --devor
npm install cypress --save-devThis command installs Cypress as a development dependency in your project.
Step 4: Open and initialise Cypress
After the installation is complete, open Cypress by running:
yarn run cypress openor
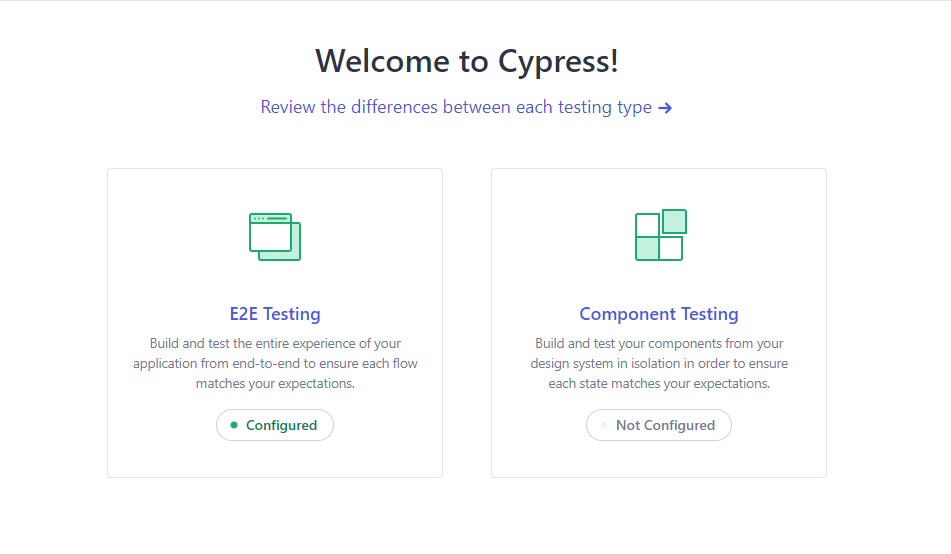
npx cypress openThis command opens the Cypress Test Runner. The first time you run it, the installer will guide you through the setup process:
- Select Testing Type: You will be prompted to select a testing type, in this example we choose E2E testing

- Configuration Files: Click Continue on the next step
- Choose a Browser: Choose your favourite browsers, e.g Google Chrome and click “Start E2E Testing in Chrome”
- Create a New Spec: Select “Scaffold example specs” to have some code examples
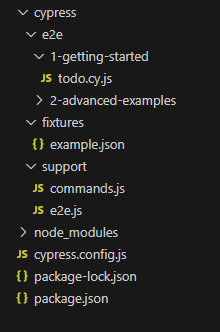
Cypress will also set up its directory structure. When you open the project in a text editor, e.g Visual Studio Code, you should see the default project structure:
 We recommend you use the same structure in your project(s).
- e2e folder - this where the test files are located. All matching files in this folder will be shown in the test runner
- fixtures folder - place to keep static files you can use in your tests
- support folder - folder to keep your custom commands and support file (e2e.js)
- configuration file - cypress.config.js, where you can overwrite default configuration
Step 5: Run Your First Test
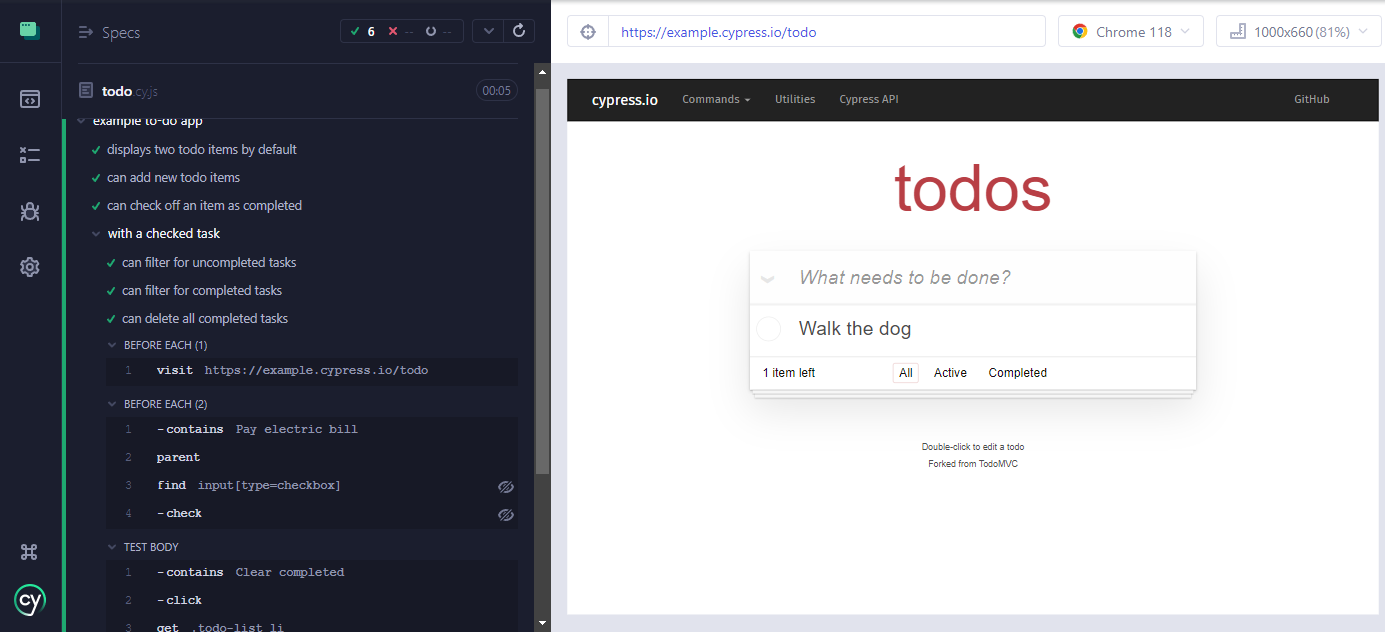
Cypress created some new files. Let’s run a test to ensure everything is set up correctly. In the Cypress Test Runner, click on the todo.cy.js file. To run any other test, just click on that test file name.
Cypress will execute the test. You should see the test steps being executed in real-time. After the tests have ran, it should look something like this:
 On the left part of the Cypress Test Runner you can see the tests and steps that were executed along with the results. When you hover over the steps, then on the right you can see the web page as it was while executing this step.
Step 6: Run Tests from the Command Line
Alternatively you can run the tests directly from command line. This way you can’t see the Cypress Test Runner. To do that, you can use the following command:
yarn cypress runor
npx cypress runThis command runs all the tests headlessly, without opening the Cypress Test Runner. The tests are run in a browser that is not visible to the user. The results will be given in the command line interface.
Conclusion
Congratulations! You’ve successfully installed Cypress using command line and run your first test. Now you’re ready to write and automate tests for your web applications using Cypress. Explore the Cypress documentation for more advanced features and configurations. Happy testing!